Feeds:
Posts
Comments

Mutant Zucchini Bread

The Spicy Child hates and despises bananas in all forms, including banana bread. She’ll *eat* banana bread, but only a little, and only because it reminds her in some small way of zucchini bread, which is her favorite.

The end of August is generally the start of Mutant Zucchini Season: those bigguns that get left in the garden plot, surprise you suddenly with their Hindenburg proportions, and leave most people pale and staggering under the weight of trying to drop them off on unsuspecting neighbors in the middle of the night.

I’ve heard rural myths that some people even deliberately go to church late, and leave bags of Mutant Zukes in the front seats of fellow congregants’ unlocked cars.

I like mutant zucchini. They’re easier to grate up and freeze in 2-cup portions, and then I can bake Mutant Zucchini Bread all winter.

Mutant Zucchini Bread is by no stretch of imagination “healthy”. But it’s better for you than chemical-laden production cake, and it’s made with love, so that makes it suitable for breakfast. It also freezes well.

This recipe works at elevations of 3500-5500 feet above sea level. Alterations to the leavening level would be needful above or below that.

High Altitude Mutant Zucchini Bread

  • 3 beaten eggs
  • 2 cups sugar (white or white with brown)
  • scant 1 cup vegetable oil for a very dense cake; use shortening for a lighter one.
  • 1-2 tablespoons vanilla. I think this covers up the veggie scent really well.
  • 2 cups grated zucchini, fresh; or 2 cups grated, frozen, thawed, and well-squoze
  • 3 cups flour
  • 1 tsp salt
  • 1 tsp baking soda
  • 1/2 tsp baking powder
  • 1-2 tsp Saigon cinnamon (more if using cheaper, less flavorful stuff)

There’s no complex method here; dump it all together and mix til pretty smooth.

Heat the oven to 350* and line two loaf pans with baking parchment.

Spread the goop into the pans as evenly as possible, and bake until done.

(Until Done is actually between 30-40 minutes at elevations of around 5000 feet above sea level. You’re looking for browning edges that are pulling slightly away from the paper, and a “crumby” toothpick to the middle. The recipe card I copied from my own mother doesn’t have the actual time. This is a Best Judgement sort of thing.)

This is quite sweet, so you don’t need a glaze or anything. Spread slices with softened cream cheese if you like.

To freeze, let it cool completely, then wrap the whole loaf in plastic cling, then a freezer bag (or double wrap in parchment and then the freezer bag.) Or, slice and briefly freeze individual slices, then wrap for longer freezer storage. Single slices pack well in a picnic lunch; they’ll defrost to edible in a few hours. You can also bake the batter in muffin cups (about 20-24 minutes) for already-portioned treats.

You could make citrus variations by decreasing the oil a tad and replacing it with orange juice concentrate, plus orange zest in the batter, or do the same with lemon juice and zest.

And, of course, you CAN do this recipe with normal-sized zucchini, but those are really nice in curry, all tender and lovely, so maybe save the big guys for this?

Fast Fashion

Spicy Hipster SkirtWhen I was about 8 or 9, my dear Mother showed me to her sewing machine, handed me the user’s manual, and said, “Here’s the book. Remember your Father faints at the sight of blood, so don’t sew your fingers.”

Thus ended my formal sewing instruction. Everything else, I learned by hook or by crook, and it has been fantastic.

Since I am a pattern designer and sewist in real life, I get a lot of questions about how young I start my kids on formal sewing lessons, and gosh, they must be pretty awesome at it, etc… and get a reaction of astonishment when I tell people that I don’t require my kids learn to sew at all, actually, and I don’t interfere with their sewing adventures until they ask me directly for help, and then I only invade minimally, and let them get back to their work without me.

I want them to have the same pride and joy in discovery as I had; it was a gift from my mother, and I want to share it along.

The Spicy Girl is getting taller (for her; that’s not very tall, but it’s a personal best, so we celebrate) and has very specific fashion tastes that don’t jive with what kid-fashion makers are putting out in stores.

(Funny aside… we were at the library Saturday, and found a book in the children’s department on “Hipster Fashions”–looking through the book, we discovered that both Little Girls fall securely under the Hipster Umbrella. Spicy’s comment was a slightly outraged, “I’m not a HIPSTER. I just like fashion that doesn’t come from the same lame stores as everyone else. And vintage is cool. And I do my own thing.” So… mini-hipster. My kids. Yay!)

Spicy finally outgrew her Sunday Bests. There’s nothing in the stores she finds appealing. So Saturday evening, I suggested we pick a nice top that had a bit of fun to it, and then grab some fabric and make a new skirt. I used to love doing that as a teen–making a new skirt on a Saturday to wear that night. It’s not couture sewing. It’s fast-fashion, and it’s supposed to be inexpensive, fun, and functional.

Learning some solid basic design skills and sewing skills gives any young person the ability to adapt, remake, or fashion from new some clothing items that meet their own personal requirements for style and comfort, without being dependent on retail selling cycles.

Spicy settled on a “retro-vintage” look: a partially-elastic drop-waist full skirt, lower-calf length so she can sit on the ground, ride a bike, or do a cartwheel without worrying about anything, accented with a cute fabric bow at the hip. After debating three different fabrics, she went with a grey and taupe “polka-spot”, for an “elegant fashion statement.”

We walked through it without a pattern. Here’s the process:

Measure a comfortably-generous hip measure (she decided on her actual full hip/bum plus 4″), and measure from waist to the desired hip point. Add a bit to allow for seam allowances and a casing at the waist. A rectangle this size, seamed together into a tube, with elastic folded in that casing at the waist, becomes the “drop waist yoke” for the skirt.

Measure from the hip point to the desired hem, and add 4″. This allows for attaching the upper edge to the yoke, and a 3.5″ hem at the bottom. Seam two full-width panels for a nice full skirt, hem the bottom, and gather to fit the yoke. Topstitch the seam allowances toward the yoke.

Fold rectangles of fabric into a pleasing composed bow, and stitch that onto the hipline at the desired spot (use a whip stitch just behind the visual horizon of the bow.)

Then get your 6’1″, 17yo brother to snap a shot of you in your new outfit, after he gives you Sorority Posing Tips, complete with Action Poses. Having a big brother who knows and appreciates girl-folk is very useful. And your mother will desperately wish she had a phone that can snap good pictures, because shots of that whole Advice Process would be awesome.

Spicy wanted to help with this project, but didn’t want to be solely in charge. She handled all the pressing, and learned how to use a hem gauge for an evenly-pressed hem. She did the machine sewing on the hem itself, carefully guiding the fabric through and doing a great job of it. She changed up her design mid-stream, opting for a gathered skirt rather than a pleated one, because she wanted “more boof.” And of course, she chose the fabric, which is a huge key to the whole outfit working.

I think she also twigged to how awesome it is to design and accomplish your own fashion… and I anticipate more than a few future Saturday Sewing adventures with my girl. It’s pretty fantastic to get to support her own ideas about comfort, fashion, and useful clothing!

One of the most common “make do” dinners is grabbing take-out burgers, right? Well, at our house, that comes with a $50 price tag, so it’s a no-go… that’s half the weekly grocery budget blown on one unsatisfying meal.

We’ve been in a long-term habit of making seasoned beef patties that tuck into the freezer, so grilling homemade burgers is a very fast Did It Ourselves option, but there’s the Nasty Factory Buns problem. I’m not a fan of chemical bread. Certainly not of the $1 “buns” that would fit best in our budget.

Then, I found a bun recipe through Taste of Home, and gave it a try. If you can use a stand mixer, these really do take about 35 minutes from pulling out the flour, to pulling the buns from the oven. They’re sturdy enough to hold up to plenty of fillings, but are nice and smooshy and soft at the same time!

  • 2 tablespoons active dry yeast
  • 1-1/4 cups warm water (comfortable on the wrist)
  • 1/3 cup vegetable oil
  • 1/4 cup sugar
  • 1 egg (optional… I often forget it. No biggie. You’ll just use a titch less flour.)
  • 1 teaspoon salt
  • 3 to 3-1/2 cups all-purpose unbleached flour

In a large bowl, whisk the yeast, water, oil, and sugar. Let this mixture stand for five minutes to get the yeast going. Whisk again; it will be creamy-looking, and may be a bit bubbly or foamy.

Whisk in the egg (if you’re using it) and salt, and about half the flour; whisk or stir briskly to combine them smoothly. Beat in additional flour to make a soft, smooth dough; depending on the humidity, you may need a bit more than 3-1/2 cups total. If you’re kneading by hand, work about 3-5 minutes until springy. If in a stand mixer, beat the crud out of it for a few minutes, and it’ll stop trying to stick to the bowl. It’s a soft dough.

Divide the dough into 12 even pieces for sandwich buns, or 20 to 24 even pieces for smaller dinner rolls. To form a nice ball, plop the dough piece in a bit of flour, and then into the palm of your left hand. Make a loose O shape with the thumb and forefinger of your left hand. Use the fingers of your right hand to push the ball gently into the O, pinching the dough edges together near your left palm. Repeat this pushing/pinching a few times to create a nice smooth-topped ball of dough.

For sandwich or burger buns, flatten the dough ball slightly, to about 1/2” thick, and place the shaped dough on a lightly oiled baking sheet (I prefer and recommend putting them on plain parchment paper instead, though), spacing the pieces 2-3” apart (they expand quite a lot during baking).

For dinner rolls, place the dough balls on piece of parchment and baking sheet about 1” apart for rolls that will touch and pull easily apart, and about 2” apart for rolls that will stay more separate,with a soft crust all the way around.

Let the dough rest for 10 minutes, or while the oven pre-heats to 425°. Bake for 8-12 minutes, until the rolls are golden brown. Let the rolls sit on the pan a few minutes, then remove them to a cooling rack to cool completely.

FOR CARAWAY RYE ROLLS:
Make as above, omitting the egg because I totally forgot about it, but use an extra teaspoon of salt, and replace about 1/3 of the flour with rye flour. Add a good tablespoon of dried caraway to the water/yeast mixture so the flavor permeates the dough.

Rye flour has less gluten than wheat, and I left the dough very sticky for a full first raise to help develop some spring. The proofed dough was less sticky, but still not as springy as all-wheat dough, so don’t expect that. It’s more like forming clay… and the buns do not puff as much, so let them raise on the counter a good 20 minutes at least. Pressing them to 1/2″ tall gave a 1″ tall bun, and they were delightful.

If you have vital wheat gluten, you could add some for a taller rise.

FOR CINNAMON ROLLS FROM THIS DOUGH:

Go back to the original, non-rye recipe above.

Right after it’s mixed (I use a stand mixer), I roll it out into a good-sized rectangle.Mix about 2 tablespoons of Saigon cinnamon, a drop or two of vanilla, about 1/4 cup brown sugar, and about 1/4 cup melted butter together into a smooth slurry, and spread it on the dough. Roll up and cut about 1.5″ thick (should make between 12 and 15 rolls depending on how you roll and cut).

In a 9×13 cake pan: line with parchment paper, and grate hard butter into the bottom (about 1/4 cup) and sprinkle with a bit more brown sugar, which all melts together into a goo.

Arrange rolls in the pan fairly loosely, and squash them down (they expand a ton, and if you don’t squash them, they go too high in the pan and don’t get baked in the middle.

Heat the oven to 400* and let the rolls sit on the counter while it heats. Bake about 18 minutes, until golden brown on top. Cool about 10 minutes, and drizzle with your choice of glaze… I made up one with vanilla, powdered sugar, and a bit of milk.

Raisins can be rolled up in the rolls if you are a gross heathen. Likewise, craisins if you so desire, or nuts, or maraschino cherries, or other tasty things.

Buns, buns, buns, bun. Good Did It Ourselves buns are a delight!

TeaTitles

So, December got a bit nutty, and we all got plague, and everyone died.

Or, at least that’s my excuse for not accomplishing the newly-8yo Lefty’s birthday celebration in a timely fashion back then.

Lefty, however, is a sadly suspicious person, for being so young.

She doubts that we all died and thinks we should have a party.

Her sister, Spicy, is a very pragmatic child. We are still pretty sure she’s 92 years old in her little spicy heart.

Wavies

So this wee miss decided to pull a Classic Dowager Duchess Grantham Maneuver. Her birthday closing in upon us, she sat herself down, took up her pen, and wrote out a stack of invitations to a Wonderland Tea Party, to be held the upcoming Saturday from 12 to 2 pm.

And then she and her sister delivered them around.

Because when Miss Spicy and Miss Lefty conspire to celebrate, they understand that the issuance of invitations will obligate their Slacker Mother to Do Something About It.

So we made petit fours and tea sandwiches, and had a party. We’re all mad here.

All-Mad-Here

The ingredients for a party of this sort include:

GUESTS

I suggest having, at a minimum, two very silly sisters, three brother-sister sibling sets, two neighbors, and a cousin with whom the sisters can swap clothes, because that’s inevitable. We very much missed one of our favorite fake cousins (who moved far south to Texas) and a few neighbors who weren’t able to come this time, but our attending blend of guests proved an admirable one. My Spicy’s Lady Grantham Skills are prodigious.

TREATS

Treats1

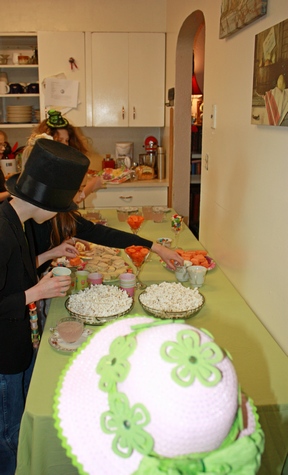
These needn’t be too terribly strenuous, but ought to include things like raw carrot coins, raw cucumbers (I can hear my  auntie delicately retching now…), a selection of tea sandwiches (in our case, wheat and white bread spread with Dilly Garden Veggie Cream Cheese, and encasing cucumbers, or ham. Interestingly enough, there was not a single cucumber sandwich remaining, and only four ham. Apparently, our Wonderlanders were pleased.); mismatched goblets and teacups and “Martinny” glasses filled with buttermints and jelly beans; the aforementioned petit fours (vanilla poundcake with strawberry jam and Lemon Cheese inside), and pink lemonade made up with club soda for appropriate Fizz. Oh, and multiple pie plates of popcorn. Short people adore fresh-popped, buttered popcorn.

Early on Saturday, we hit the local thrift shop and picked up a selection of lovely glass punch cups, some very pretty china plates, and a lovely tall china coffee pot from which to pour our beverages. And since it’s a Mad sort of tea party, the guests get presents… so the cups and plates were chosen by each guest, and taken home after.

MAKING

In my own personal quest to stop being a control freak, I deliberately plan party activities that involve Children Making Things That I’m Not Allowed To Direct Much. And since we do not believe in exclusively boyly/girly activities, we do things that Small People can all equally enjoy. Or, at least, that’s the goal.

One thing I’ve discovered in the last 19 years: kids like fridge magnets. So we made some.

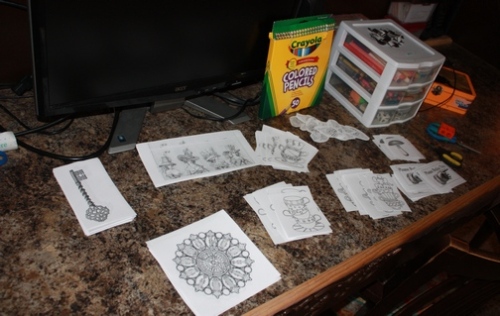
I found some absolutely smashing graphics through The Graphics Fairy, and printed out plenty of bits in black and white. I roughly cut them before the party to speed things up.

Magnet Supplies

The guests chose their favorite elements, added color as they desired, and trimmed them out neatly (and this Mad Crowd has excellent scissor and crafty skills), and brought them to me for sandwiching between layers of clear contact “paper”. Another trim out (it works best with a small margin of sealed contact paper around the edges), and they were ready for strips of self-stick magnetic tape.

Sillies2

Coloring

SILLINESS

Rather than running too many directed activities, we chose to free-range the guests, which resulted in a lot of self-guided feasting, giggling, some LEGO play, Making of Magnets, more giggling, some knitting, Dramatic Speeches, “tea” refills, and a rousing game of Two Truths & A Lie.

SilliesIt is really quite a lot of fun to hear what Shocking Lies kids of 6 to 11 will come up with, and how their real life adventures can be entirely truthful, and fool you completely. This is an adventurous bunch. Over half have had staples and/or stitches in the noggin regions. I am wondering if this has played a role in their mutual and significant Oddness/Wonderfulness.

They were all highly suspicious of my Shocking Lie (that I have met the Queen of England) and guessed that of my more hopefully-mysterious truths was a truth (that I have mutant molars.)

Our smallest guest was a wee little sprite of a girl, who was a delightful addition to the party. She’s the smaller sibling of one of the fellows, and Lefty was anxious she should be included, because said sprite is a sweet thing, and Lefty knows how hard it is to be the youngest and left at home during the fun parties. We were delighted she could come!

Sprite

Costuming was optional, but of course, the guests got in on the fun! One of our neighbors wore a smashing chapeau:

Snail-Bomb

Sadly, she was Snail-bombed.

My children seem to think that photo-bombing is the bomb. Also, they think the classic “Party On!” hand thing looks like a snail, and will pop their index and pinky fingers up and down to mimic a snail extending and retracting its eye stalks.

So they Snail-Bomb people in pictures.

And they Snail-Bomb their sisters:

Sister-Snail

And they Self Snail:

Self-Snail

Because we are all Mad, here!

(Note on Lefty’s Hair: Yes, that’s her real and curly hair. No product, no enhancement, just left to dry on its own. Last week, in the midst of a very, very busy spurt of work for me, she climbed out of bed at 11pm and said, “I am very itchy on my back, will you scratch it? And also, my hair is to0000 long and I want it cut short.” And I realized that Right That Very Moment was the only time I’d have to cut her hair for the next month, so we cut it. And her hair has remarkable rebound, because it was cut to mid-neck, and recoiled to this delightful mop. She’s happy, I’m happy, and she went back to bed by 11:15.)

(Note on Spicy’s Hair: to get slight pre-Raphaelite waves into her lovely locks, the poor smidge slept on 12 lumpy braids all night. She is pragmatic and resolved about her own hair, which normally falls in glossy sheets to nearly her waist. It’s just that sometimes, she *really* wants some waves in there, and is willing to suffer for fashion.)

Click Here for the Food Nifties, of course!

The Goodies We Ate:

Dilly Garden Veg Cream Cheese

This is great on crackers or bagels, stays spreadable even after the fridge, and makes a nice spread on bread for tea sandwiches. It’s more a process than a recipe, so quantities are variable.

  • 1 8oz brick cream cheese, paddled to death in a stand mixer
  • 1/2 cup good sour cream (Daisy brand is good. Guar gum and carageenan are not good) paddled in with the cream cheese.
  • Teeny pinch each of granulated garlic and granulated onion
  • Good sprinkle of Lawry’s Seasoned Salt (accept no MSG-laden substitutes!)
  • Thumb-and-two-fingers generous pinch of dried dill
  • Several tablespoons of *very* finely minced raw carrot (whole big ones, not “baby” ones, which are never nice)

Blend all that together, and refrigerate overnight to let the flavors marry.

Lemon Cheese

This gets put between poundcake layers with jam. Or, you know, eaten from a spoon. It’s really good.

  • 1 8oz brick cream cheese, paddled to dickens in the stand mixer
  • 4 oz room temp butter, likewise paddled
  • zest of one fresh lemon
  • juice of said lemon (paddled… the theme of the day)
  • enough powdered sugar to make a lightly sweet, still-a-bit-puckery cross between glaze and frosting. I think I used about 2 cups.

Fizzy Punch

Totally cheated.

  • 2 frozen canisters of pink lemonade mixed with half the water
  • the rest of the water replaced with chilled club soda

I could have downed the entire gallon by myself.

The Poundcake Petit Fours

I used the recipe here at Rose Bakes and really liked how it tasted and turned out! I was short of shortening, so it was 3/4 butter rather than half-half butter and shortening. I also don’t buy condensed milk usually, and didn’t want to go to the store, so I used heavy whipping cream instead. Perfectly lovely.

A Note on Parchment Paper:

If you have not done so, use parchment paper rather than tin-foil, for everything. It’s awesomely wonderful and keen. No worries about aluminum, either! Baked goods release perfectly without added fats, petit four coatings slip off like a summer breeze (for those of us who sacrificed our baking racks to corral the last batch of baby chickens and never replaced them… ahem…). It also feels very British And Traditional. So, use parchment paper. It rocks.

A Church Lady Hanky

Hanky1In my family, handkerchiefs are a hallmark of civilized living. My father always had one or two clean white hankies secreted about his person, as does his father, and my mother’s father did the same. I learned to iron by pressing those simple white squares when I was barely tall enough to see over the board.

My great-grandmother Fern’s delicate white hankies were scented with rose and powder, and seemed to dispense comfort from their very fibers. My own run the gamut from delicate and colorful prints to fine white linen.

There are hankies for blowing, and hankies for showing, and since my entire family tends to leak our emotions (both happy and sad) out our eyeballs, having hankies of all sorts is very handy.

Our church ladies auxiliary recently had a “Gal”entine’s get-together, and each person was given a brown paper bag in which to deposit an under-$5 item that holds meaning to the individual. We did “getting to know you” activities, allowing each sister to choose a bag as a “Gal”entine’s surprise.

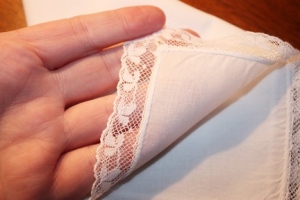
Church ladies need hankies even more than most, I tend to think, so I took a bit of time, lace, batiste, and thread, and whipped up a white “showing” hanky that is plenty sturdy enough for blowing as needed.

The square of Savannah lawn (a very light 100% cotton, fine-woven–I get mine by the bolt from Fabric Depot in Portland, OR, and oh-look! It’s on sale!–but they also sell by the yard) gets a rolled and whipped hem; this sort of work is best done by hand, as a machine will tend to slurp the fabric right into the mechanisms, making an ungainly shredded wad of formerly-lovely cotton. Machined work also loads in a *ton* of thread, which makes the edge stiff. No bueno.

The finished hem is about 1/16″ wide, and completely enclosed and sturdy, without being bulky or awkward. And yes, it can be done by hand without any Creative Cussing. However, the technique really only works with 100% cotton or linen; man-mades with poly blend will definitely inspire Creative Cussing, and that offends the Spirit, and peace will depart hence! So, use very nice cotton fabric, and find joy.

Hank4

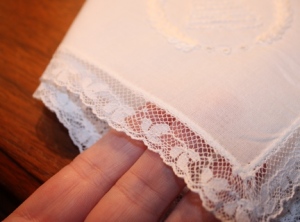
For the stitches to really disappear, the threads need to be similar in size to the threads in the weave. Gutterman’s cotton is lovely, as is YLI, which comes in 80wt and 100wt as well as more familiar 50wt (which is what you’ll find in standard sewing machine cotton.) (Below is the picture of “the wrong side.”)

Hank5

Good cotton lace is far easier to work with than poly-nylon stuff, and is well worth the time it takes to ship it in, which you’ll need to do if you only have chain fabric stores near you. (I adore Luc’s wares from Cotton Lace–he ships quickly from the Netherlands, and has lovely, lovely stuff for very small amounts of money, so it’s easy to have a few yards on hand. Or to go nutty and order 10 yards of everything you like best. You know, whatever works.)

You can also find lovely stuff from most shops in the US, Canada, and Britain that cater to heirloom sewists; another of my favorites is Farmhouse Fabrics.

The lace and hanky edge are laid right sides together, then whipped together through one header thread of the lace, and a few threads of the hem. While you might think a single thread through minuscule bits of the lace and fabric won’t hold, it’s actually very sturdy and flexible! Each corner is pleated and whipped to ease the straight lace around the right angle, and the ends of lace are running stitched and then whipped to prevent them fraying.

Hank2

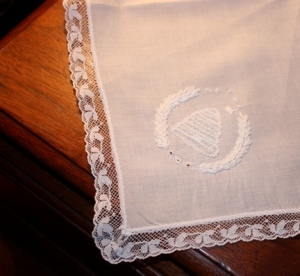
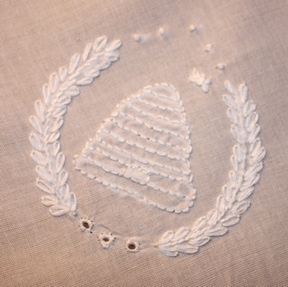
Then I did up a bit of embroidery in one corner: framing stalks of “wheat” to symbolize providence, nourishment, and endless potential (wheat has additional religious significance in my faith); a beehive with a tiny bee on the inside of the wreath, symbolizing cooperative work and productive, creative sisterhood; three worked eyelets at the foundation of the ornament to symbolize God the Father, Jesus Christ, and the Holy Spirit; five worked “seeds” above the ornament… ummm…. just because I like symmetry and making seed stitches. Not everything has to have deep meaning, right?

I tend to draw up my own embroidery designs so I can customize things, but you can use any line art to create a neat, personalized embroidery tracing! Feather stitch is a grand way to make framing “wreaths”, and you can turn virtually any font into a monogramming initial by doing “outline” and choosing a text size that prints out in a good proportion for your project.

The thread for the embroidery is actually floche, not 6-strand floss. It flattens out a bit more for more “solid” coverage, and I just like the look better. Separated 6-strand floss can work, though. The embroidery is worked in stem stitch, lazy-daisy, back stitch, seeding/granito, and whipped eyelets.

All told, it took about 3 hours start to finish on this hanky. Each minute was pleasant, so it was a delight, and each time a hanky like this gets used, it brings another small moment of delight. That makes it a worthwhile effort, don’t you think?

Finishing it up Wednesday afternoon coincided with a visit from my pastoral visiting sisters, and one of the sisters (who is a friend outside of the visiting sisters program) asked how I’d be subtly marking my bag so she could be sure to choose it for her own? We laughed about that (and it gave me a great idea for a fun surprise for her next birthday). I didn’t mark the bag (cheating at Church Lady functions is considered Not Cricket), BUT! Guess which bag my sister-friend chose? It was a treat to see it go home with a favorite Church Lady!

My own Church Lady hankies are in a sweet grey-on-white print. They’re the “Mod-Hip Church Lady” version, compared to this more traditional Church Lady Lace Frippery. And my little girls have requested their own set of Church Lady Larvae hankies, in white-ground colorful prints, so I guess they’ll be learning to narrow hem this spring!

You know, for centuries, women have been adding creative elements to the most utilitarian of objects intended for the most humble of uses, for no other reason than “because I can.” It’s very cool to rebel against paper tissues, and introduce a little bit of renewable beauty into the messy moments of life.

All The Projects

A quick post of links to projects I’ve shared here, just in time for some Making this holiday weekend… I’ll be staying in, and if you are, too, why not Make something?

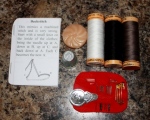
A Miniature Sewing Kit perfect for missionaries, recent grads, or anyone who wears clothes.


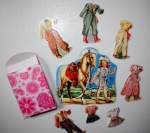
Overall PlaysetMaking a Mod-Podged Binder Playset that can be customized for any doll or action-figure play, and stores very compactly on a bookshelf.


Personalized Pillow Cases can be a great gift for people who sleep.


You can turn pretty much any printable thing into a set of Fridge Magnets.


What about a new tote for scriptures, or a little diaper bag for the Mother of Dolls in your life?


Hedge In HandOr a little soft fleece hedgehog? Don’t we all deserve a little squishy hedgehog?


HenniesOr a Bitty Hen? You need a squishy hen.


Tea Party PlaymatIf space is tight, what about a Kitchen Playmat or a Tea Party Playmat? Ours are still in use years later!


Frogs and LilypdTossable Frogs are a splash with just about any kiddo!


And, some additional down-load-able sets of gift ideas here.

This holiday weekend, I’ll be Making… working on some fun things for Lefty’s birthday (items for the doll house, and upcycling a cute top into a dress for Herself), and working on some Christmas things for Spicy, which I can’t share until Christmas, but they are AMAZING and guaranteed to make her squeak, and possibly plotz. There are also plots hatching for The Boy, and Eldest as well… Making is the best!


Larval-stage Church Lady

Larval-stage Church Lady

I’ve written before of that miraculous, wonderful creature known as The Church Lady. As I get further into my own career as a Church Lady, I’m starting to see some amazing benefits to my daughters as well, and I thought it was about time to write about how to build a Church Lady… because it really is a process, and it’s one I think can benefit most young people (not just girls).

Our middlest girl, the Spicy one, turned ten this year. She’s decided that, like her sister Eldest, it’s time for her to get to join me in serving at funeral suppers, and the other little tasks that seem to her to be hallmarks of Being Grown Up. The month of May marked her first experiences as a larval Church Lady… and what a happy little larva she is, too!

Watching her carefully choose her outfit for the first funeral luncheon (the funeral of one of our neighbors), watching her choose which pretty apron she would bring, folding it into a neat little bundle–I hoped that her experience would be a good one. I’m realistic. I can set up a situation to be as positive as possible, but it’s still going to be her experience, and that experience is between her little self and her Heavenly Father. I have to go into it all trusting that He loves her, and will give her the learning she needs, when she needs it. The First Funeral Luncheon and whatever learning it contained would have to be in His hands.

That trust was richly confirmed.

Our Church Lady In Charge is amazing. That helps a lot. Our fellow Church Ladies are generally awesome. That also helps a lot. They’ve each welcomed my girls into the fold as capital-S Sisters, and it is a joy and a blessing to me.

I quietly undertook my own assigned tasks for the luncheon, and did not interfere or direct Spicy in her work. She took her marching orders from our organizing Sister, who, being amazing, tucked Spicy under her wing and treated her with the same respect and friendliness given to the longest-serving Sister among us.

I was delighted when our organizing Sister reiterated what I had told Spicy on our way over: how to receive thanks from the family with a smile and “It’s our pleasure to serve. We’re glad to be here,” or “It’s no trouble at all. We love our Sister and want to help out any way we can,” or “We’re glad to do it.”

I watched Spicy ask intelligent questions. I watched her spring to lift things that the more fragile Sisters (one who is actually eye-to-eye with my none-too-tall 10yo!) should not lift. Her young legs and back were useful. I watched her take the instruction to “keep an eye on the water pitchers” to heart, as she zipped here and there, refilling pitchers and delivering them back with a smile and cheerful word.

I watched her visit with the Grandpas and Aunties and little children, as she made sure they had what they needed. I watched her clever little feet tip-tap briskly, carrying her from service to service, her muscled little body swathed in her best pretty apron.

I watched her take special care of our Sister who had lost her husband after an all-too-brief 66 years of marriage. I watched her seeing how love and tears and sadness and joy and grief and hope all work together.

As we wrapped it all up, I watched her eyes sparkle. I watched her watching the other Sisters as we all took off our aprons to signal the finality of our service, fold them into neat bundles, and disperse to our homes again.

And on the way home, she fairly bubbled over with happiness and observations and the recounting of her experience. The quote that made my day:

“I am going to need some good flats. I just cannot do funeral luncheons in these heels!”

I’m convinced that any young girl can benefit richly from these kinds of experiences. If anyone raising girls is wanting them to experience more connection, more compassion, more happiness, more self-respect, more cability–being built as a Junior Church Lady and serving alongside older sisters in Christ is a significant and simple way to get there.

If you’d like to build your own Church Lady, or are looking for ways to add connection and service for pre-teen or teen youth groups in a church setting, here are my top tips for making it work:

A True Invitation: I am 100% opposed to voluntelling. It’s a gross usurpation of agency, and quite frankly, it’s disrespectful and despicable.

A true invitation is low-key and sincere, and has a clear path to inclusion. There is no carrot-and-stick. It’s as simple as, “We are doing this cool thing, and we’d love to have you join us. Here’s how. Let me know if you’d like to, and we’ll make it happen.”

A True Mentor: partner them with adult Sisters who consider young people Actual People. Being tucked under the loving instructional wing of someone who likes you just for you, and has no genetic requirement to do so, is a wonderfully expanding thing for a young person. (It’s also pretty awesome for the adult Sister, too, if the ladies in my acquaintance are any representative sample. Spending time working together knits our hearts together, and that benefits young and old.)

These true mentors can be very helpful when they share their own motivations for service, and their own good experiences. I’ve noticed that the Church Ladies in my life have been ready, willing, and able to share with others *why* we serve, and that the reasons are varied and individual.

Having heard several Sisters visiting in the kitchen with Spicy about why they enjoy serving at funerals, I was delighted to hear her express her own personal motivation for service at the second funeral this month: “I don’t know this family, but I think every family should get some time to just be together, and tell stories that make them happy, even though it’s a sad time. And it’s fun to make sure everyone has what they need!”

Those are good reasons to serve. And she got there because adult women were able and willing to articulate similar reasons, and help her define the feelings she had bubbling in her tender little soul.

A True Need: no one likes to be made superfluous. Ask a young person to fulfill a meaningful task, and thank them for their help simply and sincerely and privately. Let them have the private pleasure of a job well done and truly appreciated.

The Uniform: You need the right clothes for the task. According to my Spicy child, and confirmed by the Ladies in the kitchen, the starter gear consists of Comfortable Flat Shoes, and a Pretty Apron. So you’ll need to provide those for your dear one.

(Blog rules say no single blog post should ever, ever be this long, and by the Rules, I should have about 40 cute pinnable pictures posted in here by now. Hence my tag line: Rebelling in Small Ways. Read on, MacDuff.)

Now, some practical application things if you’re trying to build some Church Ladies.

Be One Yourself. I think it does work best when Mom already has a habit of giving joyful service in ways that suit her time and her talents. If you’re not already there… well, it’s a great day to start. Pray about it. Find out what Heavenly Father wants you to do, personally, to be His hands and feet and love in the world. Then do that. And share words about it with your kids. Not bragging words, just… words. Let them know what you’re doing, and why, and that they can do it to, and how.

Do Some Lead-Up. Few people like to be thrown into something cold. So suggest some activities for the youth that introduce skills and concepts they can use in Church Lady service. Perhaps baking, or freezer meals, or other food-type skills they’ll use in college, mission, and adult life. Let them learn some basics together. These can be great additions to Personal Progress planning and activities. Then:

Have An Easy-Intro Service Opp. One simple thing I’ve done is to invite the young women to participate when I take around a sign-up sheet for New Baby meals. It takes only a few seconds to blurb it, and let them know they’re welcome to partner up and bake a treat for a meal, or work with their mom, auntie, grandma, or another Sister to help with a meal.

Let them know there are ways to ease into it, too. If they’re not up for food prep or service during the luncheon? They could come over and set up tables, or come after for take-down and sweeping. Those portions of service are vital, and still ripe with camaraderie.

Do Some Pre-Service Prep. Many young people have not been around much death, or around grieving rituals. Let them know what to expect, and some simple phrases to use in response to family thanking them, and that sort of thing. Do it all in conversational tones. This stuff is not scary. It’s just new. They can handle it.

Treat Them Like They’re Real People. And by Real People, I mean separate from their adult female relatives, and a complete person in their own right. Contact them directly, without passing messages through others. Ask for them by name, and treat them as a peer. It is thoroughly gorgeous what being treated as a valued peer by adult women does for a girl.

Teach Watch-Care At Home and Away. This starts when they’re little–teaching them to notice the needs of others, and consider how they might personally fill a need. Noticing and thanking them for the little acts of service they do is important, too. Maybe the wash cloths didn’t need to be re-folded, maybe you already have five dandelions-taped-to-paper, but they saw what they perceived as a need, and filled it with gladness, and did it to serve, so recognize it and accept it as love!

As they grow, this paying-attention-and-acting-in-love morphs into a kind of personal visiting pastoral care. Even without formal “route assignments”, young women can observe the needs of others and seek inspiration to fulfill them. Do what you can do make it possible for an observant girl to take a treat or card to a recovering friend, or to pop across the street to help a neighbor with something. Allowing them the freedom to act on their inspirations teaches them to hear God, and act on what He’s telling them. Their service will be different from yours. That’s cool. Rearrange what you can to make it possible. This stuff is important.

Trust God. The building of a Church Lady is not something we can control. It’s God’s process, and we need to relax and trust it! Don’t over-analyze another’s experience. Don’t ask a girl “HOW WAS IT? HUH? DID YOU LOVE IT??!!?” Give them space and time to process, and just let it be, trusting that their Father will use each situation to teach them what HE wants them to know. It is not within our power to control their experience. We can only set up favorable conditions, and step back and let them live it.

So, that’s how I was built to be a Church Lady. It’s working with my girls, and I’m so grateful. Give it a shot.

Faux-French Bread

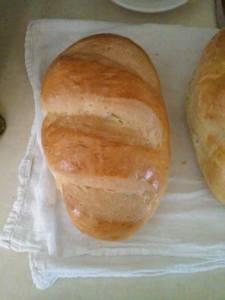
So, I made a batch of French bread today.  Never Buying Loaves AGAIN.

1.5 Tablespoons yeast
1.5 Tablespoons sugar
1.5 Tablespoons oil
1 Tablespoon salt
2.5 cups warm water
about 6 cups flour

Mix all together down through water, and proof 10 minutes. Add 4 cups flour and beat the crud out of it; add up to 2 cups more to form a loose-but-nice dough. Proof, stopping by to give it a good smack down every 20 minutes for an hour or so. What will have started out as a somewhat sticky dough will autolyze into a lovely smooth elastic dough. It’s bread magic.

Divide and form 4 batards/oblong loaves, really TIGHTLY shaped (there are videos… I do a rounded-end baton, rather than a batard, but it’s fun to write Four Fat Batard Breads).

Place on an oiled sheet or parchment paper, and brush with egg wash (this is the faux bit… true French breads get their shattering crisp crust by added steam in the first part of high-temp baking. The egg wash will create a shiny, sorta-crisp crust, much like the big-store-bakery loaves, but *not* like actual French bakery loaves); slash deeply 3-4 times down the length. Preheat the oven to 425* while they rise til doubled.

Bake 425* for 10 minutes, then turn the oven down to 375* and bake another 20 minutes. Remove and cool on a rack until you can’t stand it anymore, and break open a loaf.

For scale, this fat batard is 10" long.

For scale, this fat batard is 10″ long.

There are loads of different homeschooling philosophies, but one of my favorite thinkers is Charlotte Mason. I like her foundational principles because I find them deeply respectful of and compassionate toward children; her thinking just seems to fit with a gentle, gospel-centric family culture really well!

NotMolly

Once upon a time, the only way to get hold of her writing was to track down her original essay series in hardcover form… thanks to the wonders of the internet, now there are some great on-line resources!

https://simplycharlottemason.com/ is laid out very cleanly–there’s a LOT to explore around the site, but it’s pretty intuitive, and there are some good summaries and get-started ideas there.

https://www.amblesideonline.org/ has the original Charlotte Mason texts for free on the site, which I find highly useful. If you’re not used to 19th century writing, you’ll find her work a bit of a slog, but it’s gorgeous language, and full of deep thought and compassion.

Now, both sites give curriculum layouts–but keep in mind that the philosophical structure of Mason’s work does not proscribe a particular set of resources. That’s what I like so much about her philosophy. It’s a MINDSET, and you can use whatever resources to fulfill that mindset and home culture as are best fit to your family.

For instance, we use Mason-style philosophy combined with John Holt style unschooling. I have friends who combine Mason’s philosophy with far more structured “classical school at home” set-ups. BOTH are consistent with the underpinnings, and both work. So you’re not locked into anything. It’s just the philosophy.

Some of the things I like best about Charlotte Mason are: focus on character, meaningful work, twaddle-free learning, “living” books and tools, the basic respect for the humanity and soul of a child, a grand appreciation for outdoor activity… it’s just so lovely and gentle and humane, and fits so well into gospel-centric living!

GOSPEL RESOURCES:
* The Scriptures (can’t get much more Living Book than that!)

* Church magazines like The Friend for child-centered application of gospel principles, though you will generally have to weed out “inside the box” thinking on some topics.

* Preach My Gospel as a resource for parents–some good teaching and mentoring strategies there!

* The Primary section on LDS.org... so many great bits of art, music, and scripture/theme notes to harmonize home teaching with Primary class topics and sharing time.

* Hymns and Primary songs to use in the music and poetry sections of a CM base

* Pioneer, church history, and world faith stories are all living stories, not twaddle.

* The Church History museum and archives all have fantastic art to study, and there are very low-cost art prints from the distribution center.

* Nature and science study can be given a Gratitude To Heavenly Father base that really, really lets us all experience joy!

* Prayer and scripture, singing, etc, built into the day’s work…. I’m working on a fun project to do with hymns, and when it’s ready, I’ll share.